
Web Dev Kit in Squirrly Cloud
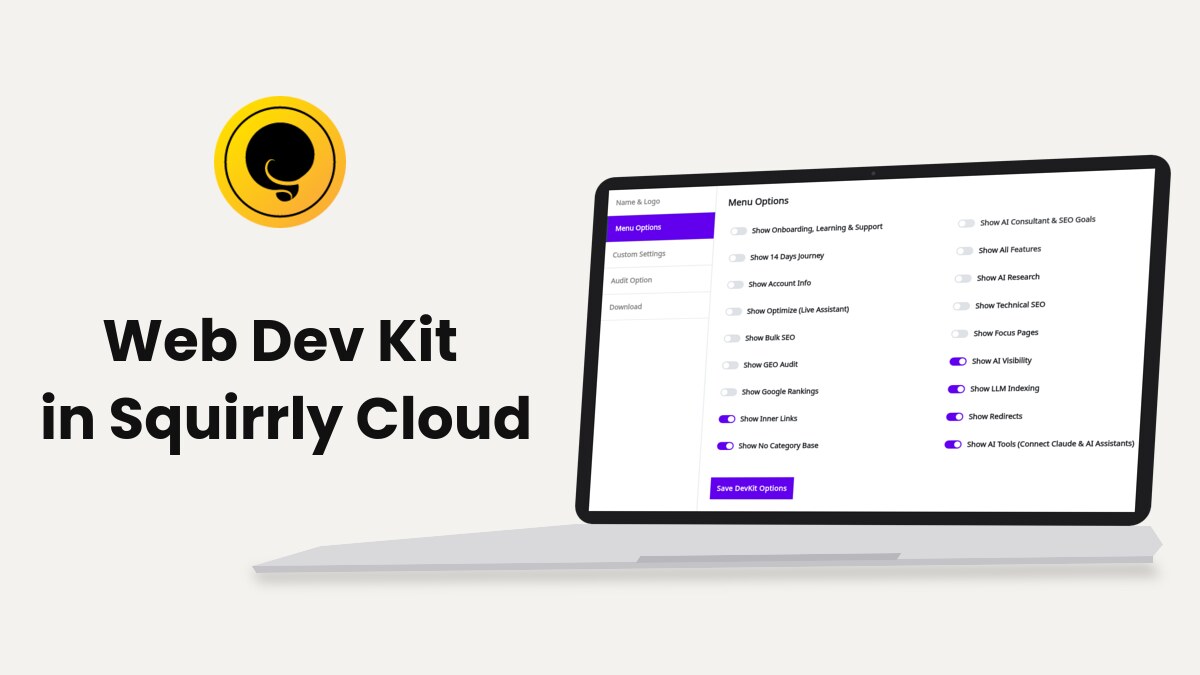
The Web Dev Kit lets an agency customize Squirrly SEO in Squirrly Cloud, download the result as a ZIP and install that ZIP on client sites. Every client site connects to the agency’s account, so the client needs no Squirrly login.
The options are under Dev Kit Settings in the top bar of Squirrly Cloud. The Cloud screenshots come from a test account with the Dev Kit on.
What the Web Dev Kit is
The screen puts it in one line: “The Web Dev Kit allows you to customize Squirrly SEO and install it on your clients’ sites.” On your account that comes down to three parts.
| Part | Where you set it | What it holds |
|---|---|---|
| Plugin options | DevKit tabs | One saved set: name, logo, menu switches, custom settings, audit texts |
| Plugin ZIP | Download tab | Squirrly SEO with your saved options and your account’s token inside |
| DevKit Packages | Limits & Packages | Limits per website for Keyword Research, Focus Pages, Audit Pages and SERP Checker |
A client site is a website on your account. There are no client accounts, and an account has one login. Dev Kit Advantages lists what changes for you and for the client, and Web Dev Kit options explains every switch one by one.
Plans with the Dev Kit
WEB DEV KIT and BUSINESS are the plans on sale that include it. The Web Dev Kit page shows what agencies get. An account that already has the Dev Kit sees DK Agency 10, DK Agency 30 and DK Agency 50 on Pricing & Plans.
Some older subscriptions have the Dev Kit too. Google Rankings needs the Business plan or the Web Dev Kit plans. Squirrly Cloud account and plans covers upgrades and billing.
Where to find it
- Log in at cloud.squirrly.co.
- Click Dev Kit Settings in the top bar, or Dev Kit in the left menu of the Dashboard.
- The screen Customize & Download Squirrly SEO Plugin opens at cloud.squirrly.co/user/devkit.

The left column has two items, DevKit and Limits & Packages. DevKit has five tabs: Name & Logo, Menu Options, Custom Settings, Audit Option and Download. An account without a Dev Kit plan that opens this address lands on the Dashboard.
All the fields save with Save DevKit Options, into one record. The Cloud keeps only the last saved set.
Name & Logo tab
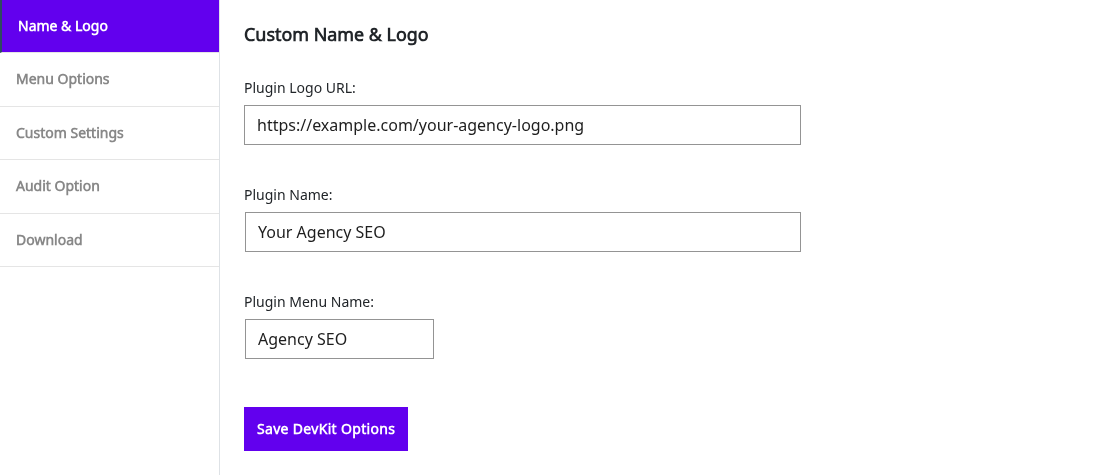
The tab is titled Custom Name & Logo and has three fields.
| Field | What it changes on the client site |
|---|---|
| Plugin Logo URL: | The icon in the WordPress menu, the logo in the plugin header and the icon of the box in the post editor |
| Plugin Name: | The name on the Plugins screen |
| Plugin Menu Name: | The word in the WordPress menu, the admin bar and the plugin’s top bar |
The Cloud copies the logo into the ZIP when you download it, so the image address doesn’t have to stay online.
Menu Options tab
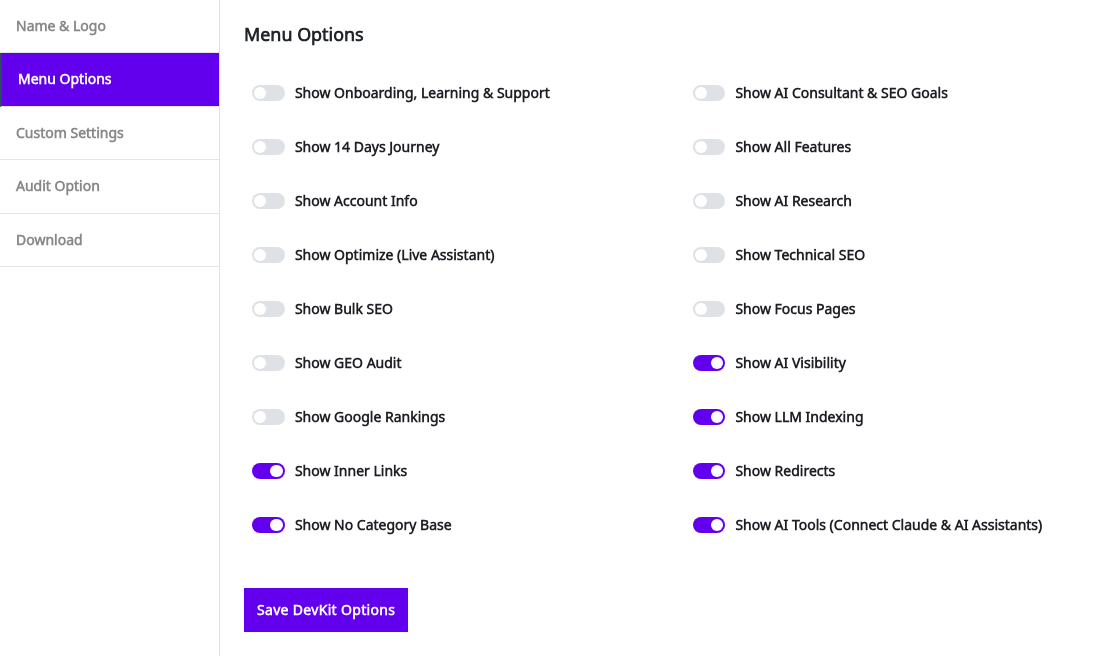
The 18 switches decide what the client sees in the plugin menu, and all of them start on. A switch hides the menu entry. The feature keeps running.
| Switch | Hides in the client’s plugin |
|---|---|
| Show Onboarding, Learning & Support | Onboarding, the Learning tabs, How To & Support |
| Show AI Consultant & SEO Goals | AI Consultant, Progress & Achievements, the red count |
| Show 14 Days Journey | The Journey block |
| Show All Features | All Features and Main Features |
| Show Account Info | Account Info, the Cloud App feature card |
| Show AI Research | AI Research |
| Show Optimize (Live Assistant) | Optimize |
| Show Technical SEO | Technical SEO |
| Show Bulk SEO | The Bulk SEO tab and its feature card |
| Show Focus Pages | Focus Pages |
| Show GEO Audit | GEO Audit and AI Visibility |
| Show AI Visibility | AI Visibility alone |
| Show Google Rankings | Google Rankings |
| Show LLM Indexing | LLM Indexing |
| Show Inner Links | Inner Links |
| Show Redirects | Redirects |
| Show No Category Base | The No Categories tab |
| Show AI Tools (Connect Claude & AI Assistants) | The AI Tools tab of Technical SEO > Connect Tools |
Automation under Optimize and Reusable Schemas have no switch on this page, so they stay visible.
Custom Settings tab
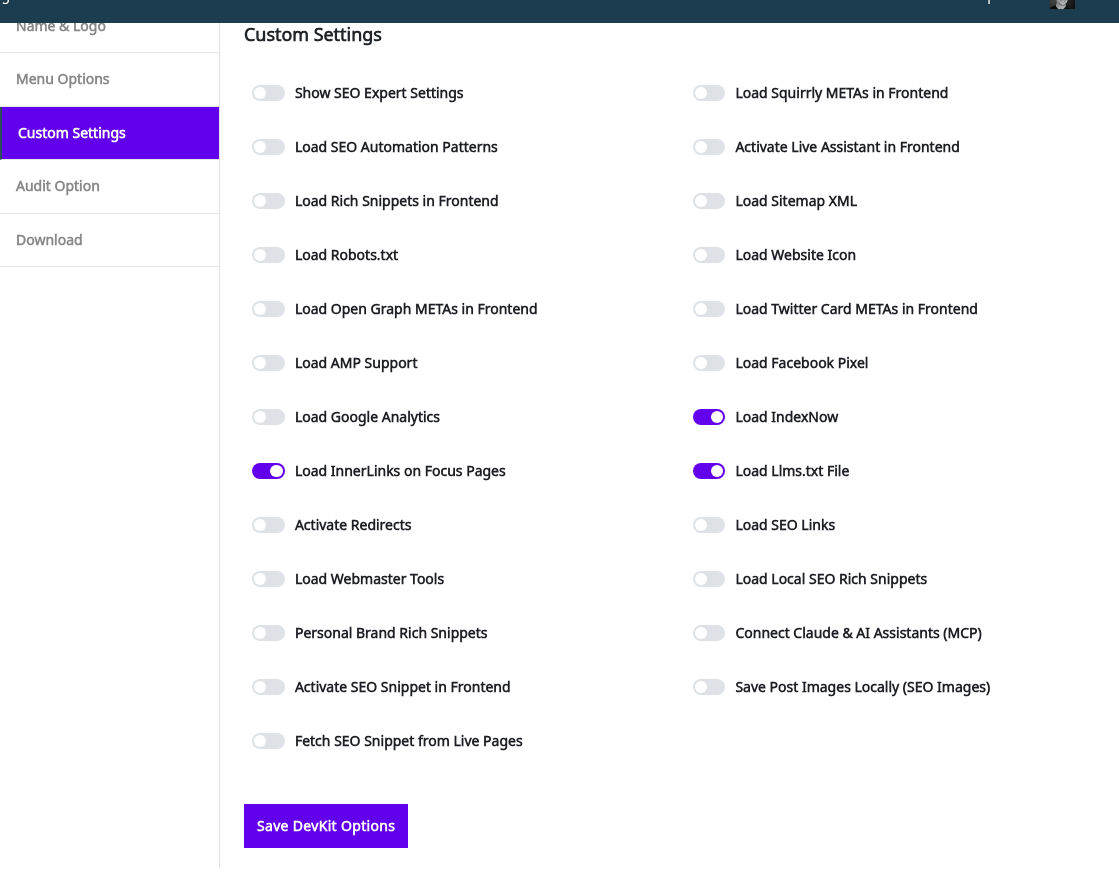
These 25 switches are starting values. The plugin copies them into its settings, and the client can change them later on any screen you left visible.
| Switch | Default |
|---|---|
| Show SEO Expert Settings | Off |
| Load Squirrly METAs in Frontend | On |
| Load SEO Automation Patterns | On |
| Activate Live Assistant in Frontend | On |
| Load Rich Snippets in Frontend | On |
| Load Sitemap XML | On |
| Load Robots.txt | On |
| Load Website Icon | On |
| Load Open Graph METAs in Frontend | On |
| Load Twitter Card METAs in Frontend | On |
| Load AMP Support | On |
| Load Facebook Pixel | On |
| Load Google Analytics | On |
| Load IndexNow | On |
| Load InnerLinks on Focus Pages | On |
| Load Llms.txt File | On |
| Activate Redirects | Off |
| Load SEO Links | Off |
| Load Webmaster Tools | Off |
| Load Local SEO Rich Snippets | Off |
| Personal Brand Rich Snippets | Off |
| Connect Claude & AI Assistants (MCP) | Off |
| Activate SEO Snippet in Frontend | Off |
| Save Post Images Locally (SEO Images) | Off |
| Fetch SEO Snippet from Live Pages | Off |
Three menu items need a switch on both tabs. With the defaults, Activate Redirects is off, so the client gets no Redirects item even with Show Redirects on.
| Menu Options | Custom Settings |
|---|---|
| Show Redirects | Activate Redirects |
| Show LLM Indexing | Load IndexNow |
| Show Inner Links | Load InnerLinks on Focus Pages |
Audit Option tab
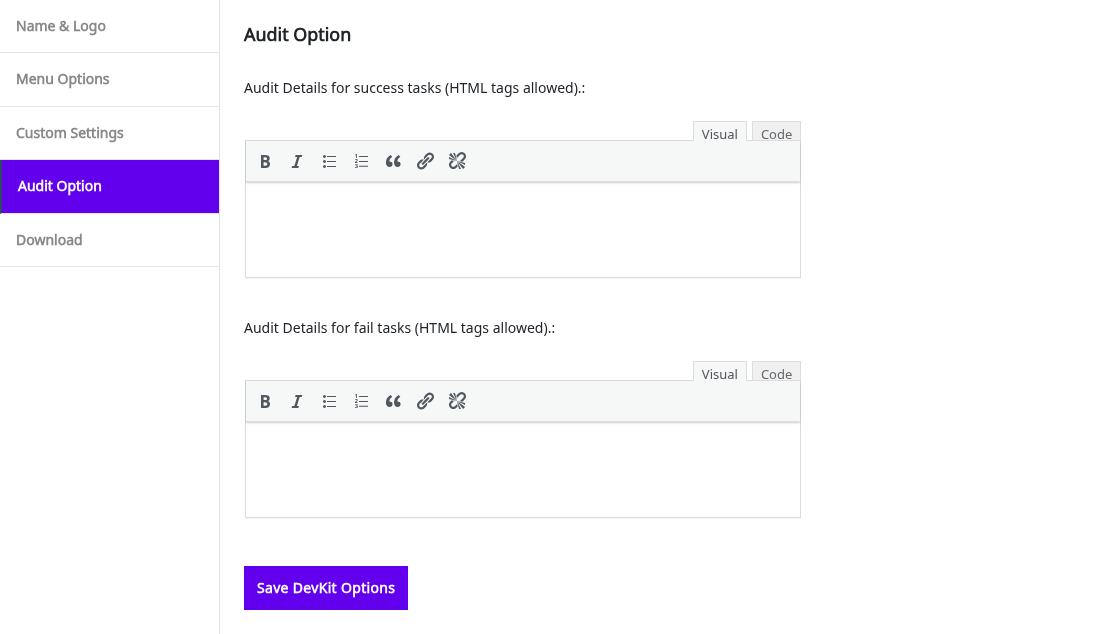
Two fields put your text into the GEO Audit tasks: Audit Details for success tasks (HTML tags allowed). for passed tasks and Audit Details for fail tasks (HTML tags allowed). for failed ones. Each replaces the description on those tasks and removes their Pro Tip.
The allowed tags are a, img, br, p, em, b, strong and h2 to h6. The editor toolbar offers lists, but ul, ol and li aren’t on that list, so use line breaks. Your texts also show on your own GEO Audit in the Cloud.
Download tab and what’s in the ZIP
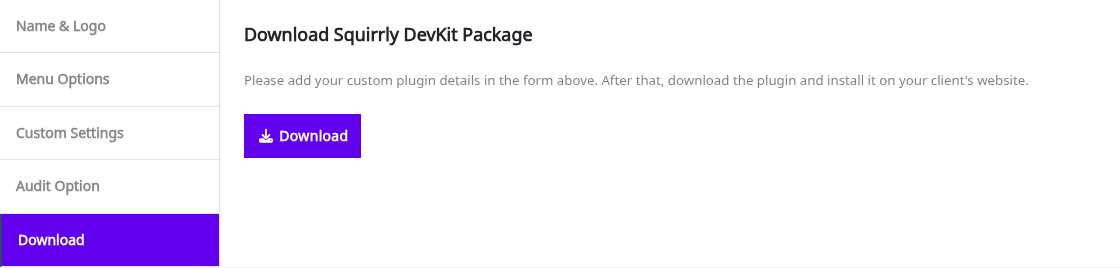
- Set your options on the other tabs and click Save DevKit Options.
- Open the Download tab, under the heading Download Squirrly DevKit Package.
- Click Download and save the ZIP.
Before the first save the button is disabled and reads Save the Plugin details first.
| In the ZIP | Details |
|---|---|
| Squirrly SEO | The latest release from WordPress.org, checked at most once an hour |
| squirrly-seo/package.json | Your saved options and your account’s API token |
Treat the ZIP like a password. It connects any site to your account, so don’t post it or send it to anyone who shouldn’t have that access.
The file goes straight to your browser and the Cloud deletes its copy, so it never sits at a public address. On the client site, the plugin reads package.json, copies the values into its options and deletes the file. The token connects the site on the first check-in, with no login, and the site shows up in Connected Websites.
Later updates are normal WordPress updates, and the options stay because they live in the site’s database. A new ZIP is only for a change on the DevKit tabs: name, logo, menu switches, custom settings or audit texts. Packages live on the Cloud, so a limit change needs no ZIP.
Limits & Packages
The screen at cloud.squirrly.co/user/devkit/limits reads: “Add individual DevKit Packages and set specific limits for each site/client for the following features: Keyword Research, Focus Pages, Audit Pages, SERP Checker.” A package here is a set of limits, not the ZIP.
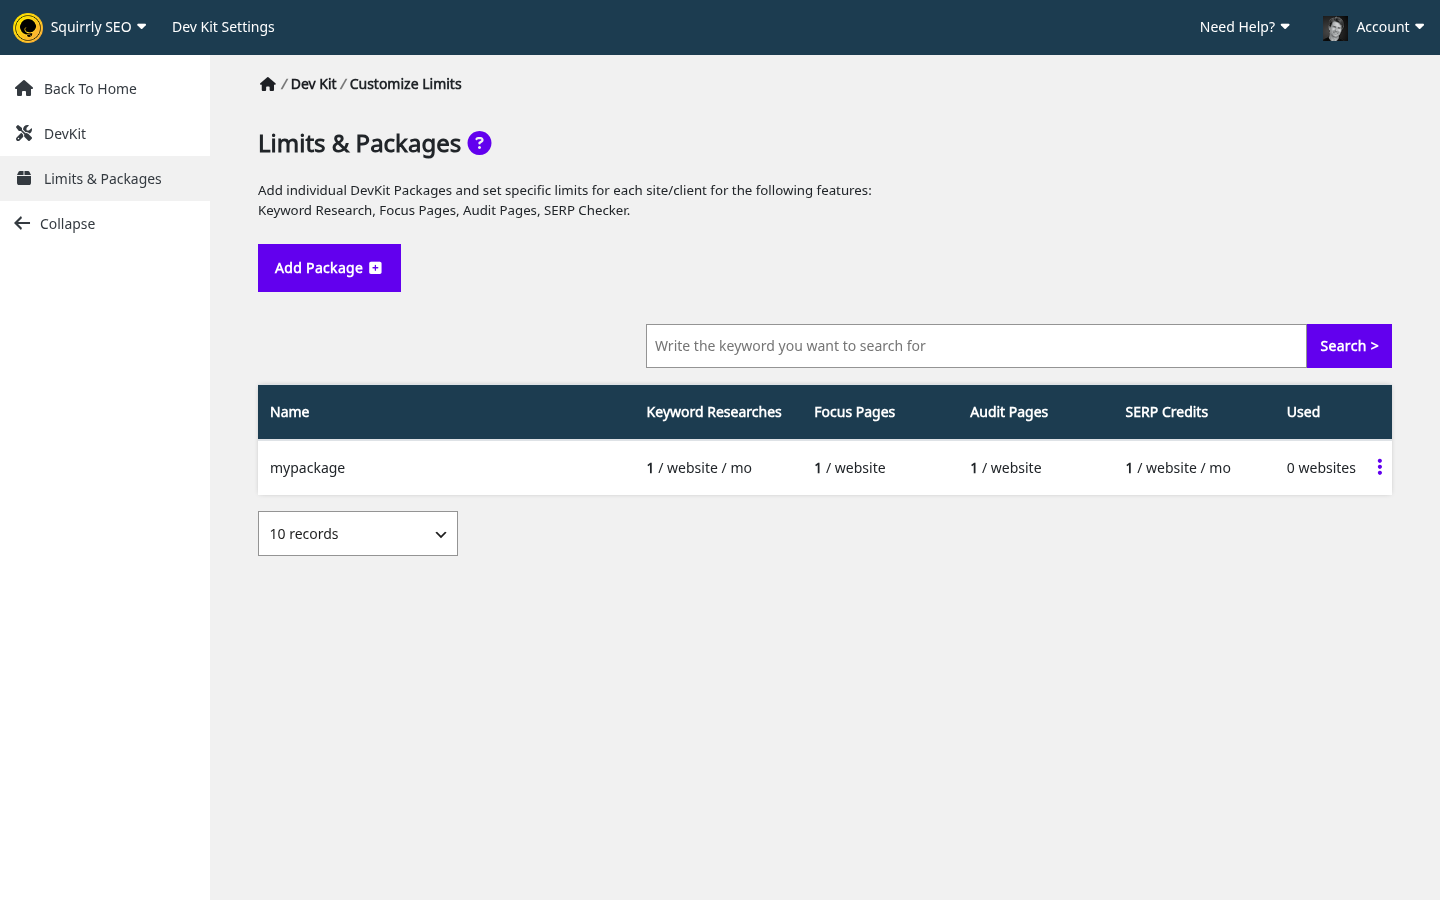
Add a package
- Go to Dev Kit Settings > Limits & Packages.
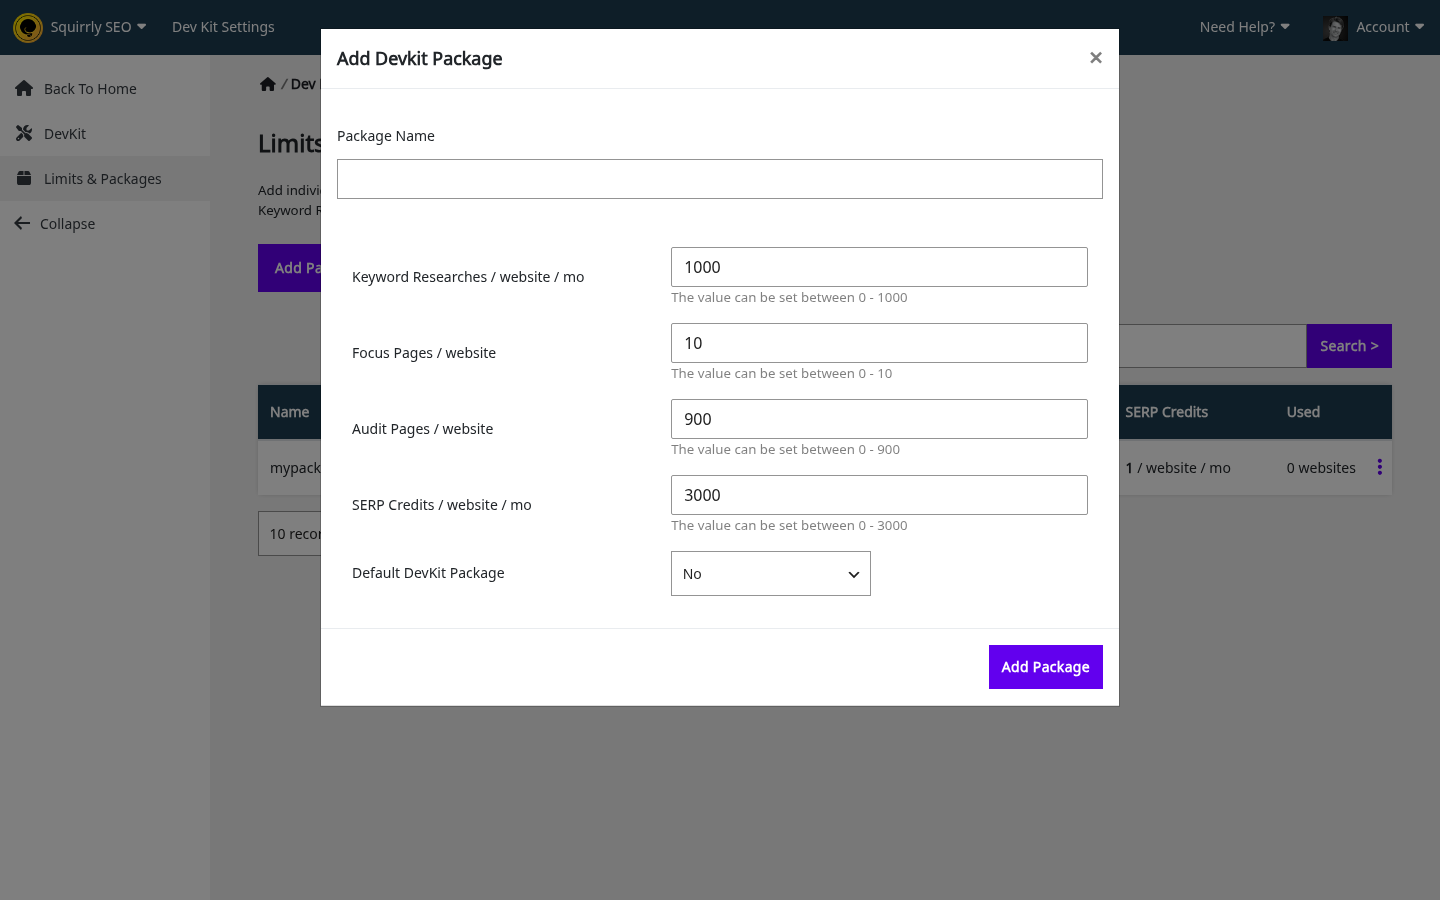
- Click Add Package. The window Add Devkit Package opens.
- Fill in the fields below and save.
| Field | What it sets |
|---|---|
| Package Name | The name in the list and on the website row |
| Keyword Researches / website / mo | Monthly researches for one website |
| Focus Pages / website | Focus Pages on one website |
| Audit Pages / website | Audit pages on one website |
| SERP Credits / website / mo | Monthly credits for one website, shown only on plans with SERP checks |
| Default DevKit Package | No or Yes. One default at a time: a new default clears the old one |
Each number field says “The value can be set between 0 -” and your plan’s maximum. The server moves a value outside that range to the nearest limit.
Read, edit or delete a package
The list shows Name with “(default)” under the default package, the limits, and Used, the number of websites on that package. Hover over Used to see their addresses. The three-dot menu has Edit Package and Delete, and Delete asks “Do you want to delete it?”. The list has a search field, Show All and page sizes from 10 to 500 records.
A package set on a website can’t be deleted. Move those websites to another package first.
Give a website its package
- Go to Websites to open Connected Websites.
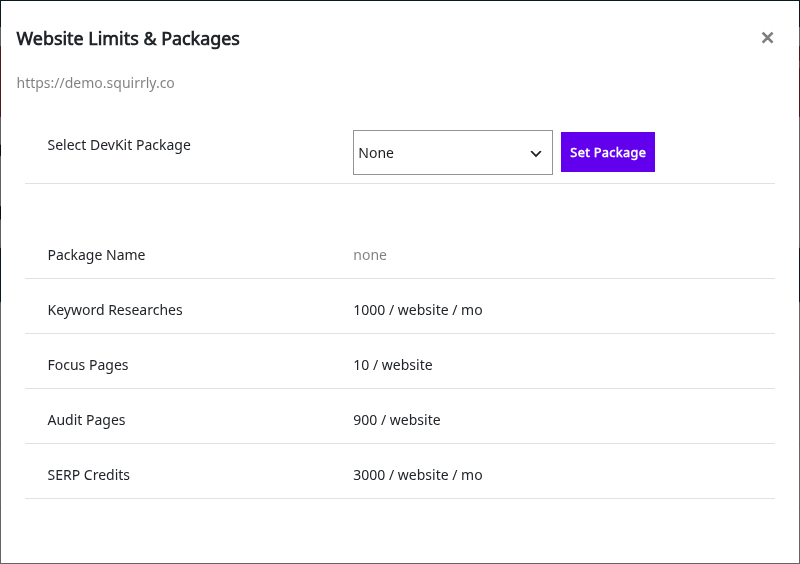
- Click the box icon on the website’s row. Its tooltip is Website Limits & Packages.
- In Select DevKit Package, choose a package or None.
- Click Set Package.
With no packages on the account, the pop-up shows a button Add Packages instead. Once a website has a package, its row shows a line such as “PK: name, KR: n/mo, FP: n, AP: n, SERP: n/mo”, and the box icon gets a check mark.
What a package changes
The package replaces the per-website maximum for Focus Pages, Audit Pages, Keyword Researches and SERP credits. A website with no package gets the default package, and with no default it gets your plan’s limits.
Your account’s total still applies. Keyword research on a website stops at the smaller of the package allowance and your account balance.
How an agency uses it, step by step
- Buy a plan with the Dev Kit.
- Open Dev Kit Settings, set the name, logo, menu switches, custom settings and audit texts, then click Save DevKit Options.
- Download the ZIP from the Download tab.
- In Limits & Packages, create your packages and mark a default.
- On the client’s WordPress, go to Plugins > Add New Plugin, click Upload Plugin, install the ZIP and activate it.
- Check that the site shows in Connected Websites and set its package.
- If the client should get the weekly audit, set the email address for that website in GEO Audit > Settings.
- Work from the Cloud: pick the website in the top bar, then run Keyword Research, the audit, rankings and stats.
A client with different branding needs its own ZIP. Change the options, save and download again. The Cloud keeps only the last saved set, so each save gives you one ZIP, and you keep the files.
Reports for clients
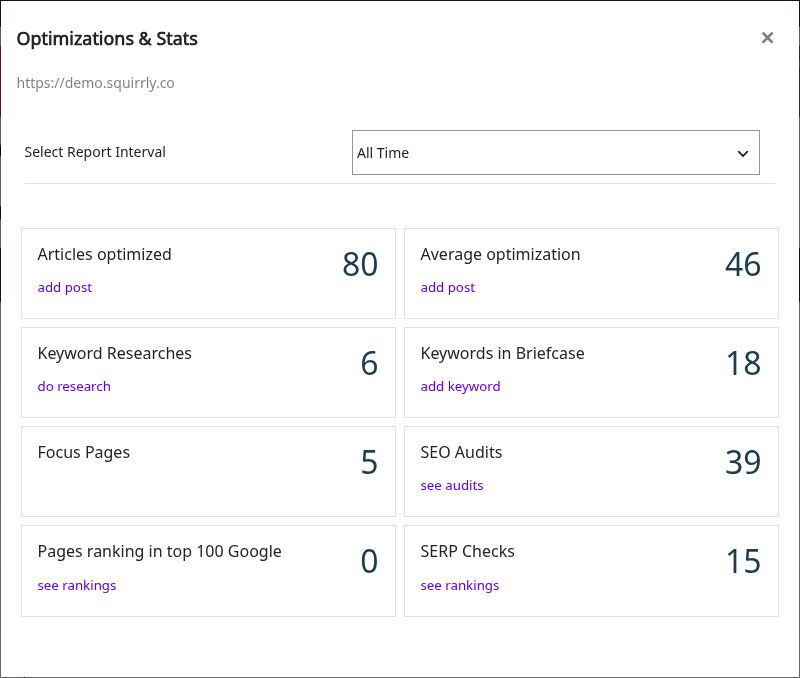
You have two things to report from: the Optimizations & Stats pop-up on each website row and the weekly audit email. The Cloud has no report generator and no PDF export.
What clients see
- A plugin with your name, logo and menu, in WordPress only. They get no Cloud login.
- Only the menu items you left on.
- Their limits in the plugin’s account block, while Show Account Info is on.
- Your texts on the GEO Audit tasks.
- The Cloud login page, if they click a Cloud link in the plugin. Dev Kit accounts have no one-click sign-in from WordPress.
The word Squirrly and squirrly.co help links still show in many plugin screens. Open the screens you left on before you hand a site over.
Sites that already run Squirrly SEO
A ZIP uploaded over a connected site applies on the next page load, with no reactivation. Its option values are written over the ones on the site, and the site stays on the account it’s connected to.
The Dev Kit options work only while that account has a Dev Kit plan. To move a site from another account to yours, click Disconnect in the plugin’s account menu first, then upload the ZIP. Using the Web Dev Kit on a Website where Squirrly SEO is Already Installed has the full route with a backup, the removal and the restore.
When the subscription lapses
No notice appears. The plugin reads the Dev Kit status on each check-in, and the sites go back to standard Squirrly SEO.
| Part | What happens |
|---|---|
| Name, logo, menu name, audit texts | They stop loading, and the site shows standard Squirrly SEO |
| Menu switches | Every menu item shows again |
| Custom settings | The values stay, because they’re ordinary plugin options |
| Account limits | With no paid plan left, the account falls back to the Free plan, and websites over the Free limit turn into Limit Exceeded rows |
| Account Info | Due Date shows in red once it has passed |
| Dev Kit menu in the Cloud | It can stay visible, because that menu doesn’t check the end date |
Troubleshooting
| What you see | What it means | What to do |
|---|---|---|
| “Save the Plugin details first” | No saved options yet | Click Save DevKit Options |
| “Can not create archive! Please contact us.” | The ZIP failed to build | Contact support |
| “Can’t add DevKit Package!” or “Can’t save DevKit Package!” | The package wasn’t stored | Try again, then contact support |
| “The package is in use. Can’t be deleted.” | A website still has this package | Check Used, then give those websites another package |
| “Can’t delete DevKit Package!” | The delete failed | Try again, then contact support |
| “Can’t load DevKit Package!” | The package list didn’t load | Reload the page |
| “Limit Exceeded” on a website row | The account is over its website limit | See Squirrly Cloud websites |
Dev Kit Settings isn’t in the top bar
The link shows only on accounts with a Dev Kit plan, so check your plan on Account Info.
The logo or menu name doesn’t show on a client site
Check which account the site is connected to and that the account has a Dev Kit plan. Squirrly Cloud notices and errors lists the connection messages.
A Cloud link in the plugin asks for a login
Dev Kit accounts have no one-click sign-in, so log in with your agency account.
Frequently asked questions
Do my clients need a Squirrly account?
No, client sites connect on your account and clients have no Cloud login.
Can I keep several client setups on the Cloud?
No, the Cloud keeps the last saved options, so keep one ZIP per setup on your side.
Do I need a new ZIP after I change a package?
No, packages live on the Cloud and need no new ZIP.
Does a hidden menu item turn the feature off?
No, the switch hides the entry and the feature keeps running.
Can I export a client report as a PDF?
No, the Cloud has the stats pop-up and the weekly audit email, and this FAQ on client reports has more.
Related tutorials
- Web Dev Kit: All Plugin Customization Options Explained: every option, one by one.
- Dev Kit Advantages: what changes for you and the client.
- Using the Web Dev Kit on a Website where Squirrly SEO is Already Installed: move a site to the Dev Kit plugin.
- Squirrly Cloud websites: the Connected Websites list and its icons.
- Squirrly Cloud account and plans: plans, billing and limits.
- As an agency, if a client stops using us, what should we do with installed Squirrly on their website?: when a client leaves.


0 Comments